Working with Batches
While you can deploy service interconnection fabric components one by one, using the batch deployments accelerates your migration to clouds even more.
With batch deployments, you can easily extend your existing fabric or automatically create a new fabric. The easiest and error-proven way to do that is to perform three steps as follows:
- export your existing fabric to a yml-file with one
bwctlcommand, - edit and save the yml-file,
- run the batch deployment from the yml-file with another
bwctlcommand.
Extend Existing Fabric
Create Batch File Template
First, set bwctl to an existing fabric by running this command with the fabric
name–in this example myfab5 –as the argument:
(None) bwctl> set fabric myfab5
You should see output similar to:
[2019-10-14 16:03:56.255] Active fabric: 'myfab5'
Notice that your bwctl prompt has changed, now showing the active fabric:
(myfab5) bwctl>
Now, export the current fabric state by running this command with the file
name–in this example myfab5.yml –as the argument:
(myfab5) bwctl> export fabric myfab5.yml
You should see output similar to:
[2019-10-14 16:08:44.299]  Exporting to 'myfab5.yml'
[2019-10-14 16:08:44.403]  Fabric configuration exported successfully
In this example, the fabric comprises:
- two VPCs in Azure,
- orchestrator node in one VPC,
- one processor and one workload in another VPC.
The fabric resource graph is shown below.
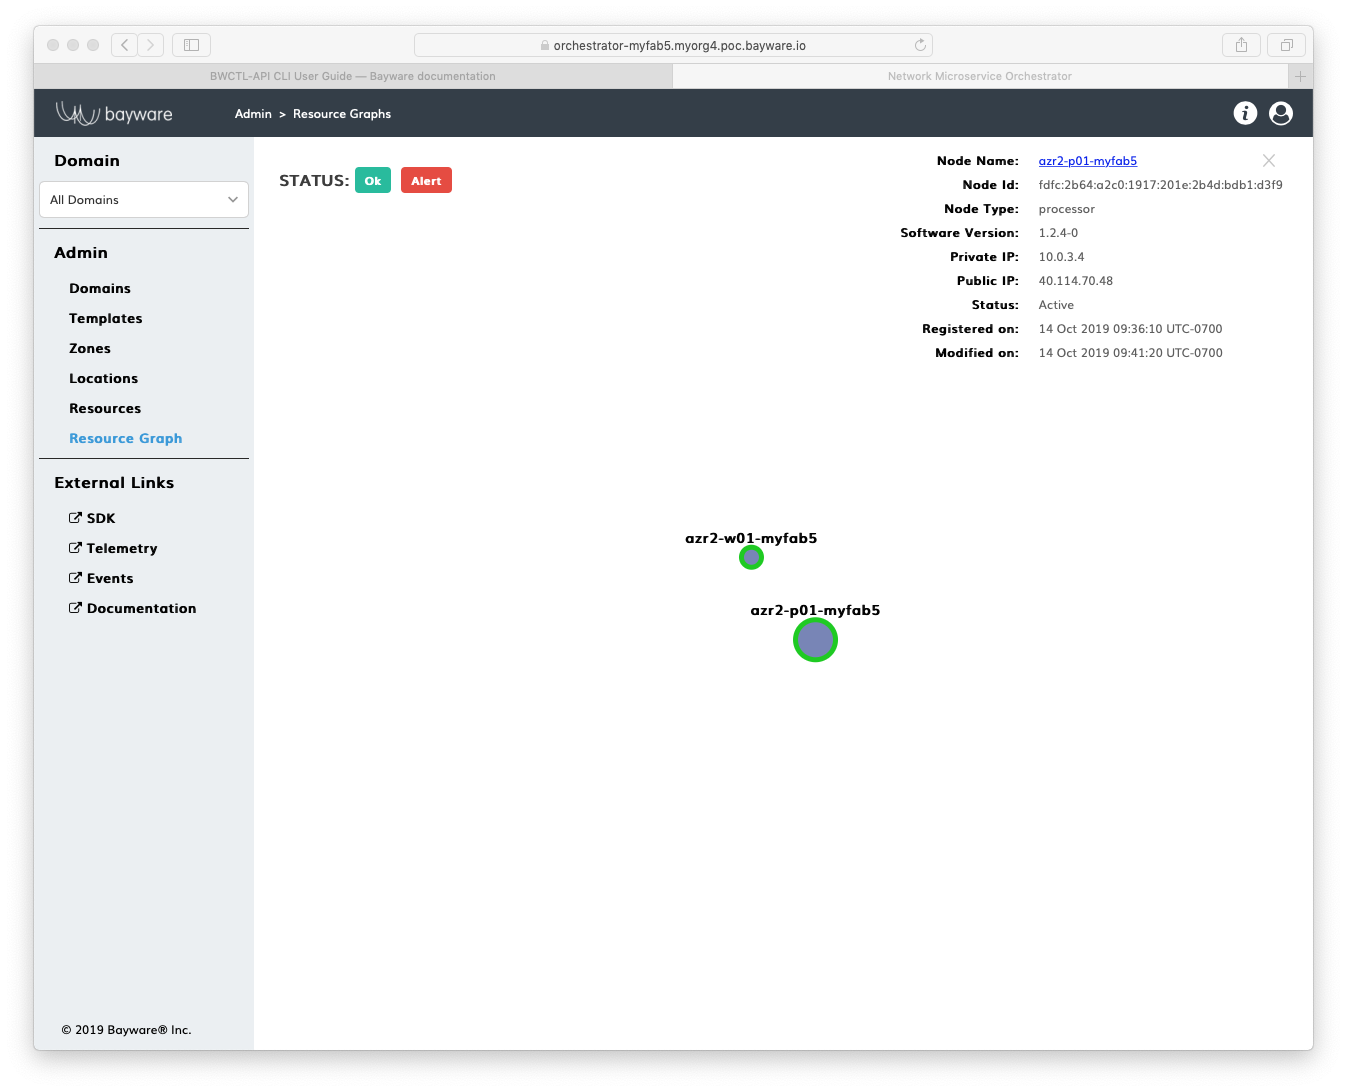
Fig. 122 Initial Resource Graph (Azure)
The file with the current fabric state contains:
---
apiVersion: fabric.bayware.io/v2
kind: Batch
metadata:
  name: 'myfab5'
  description: 'Fabric "myfab5" export at Mon Oct 14 16:50:38 2019'
spec:
  - kind: Fabric
    metadata:
      description: 'optional description'
      name: 'myfab5'
    spec:
      companyName: myorg4
      credentialsFile: {}
      sshKeys:
        privateKey: {}
  - kind: Orchestrator
    metadata:
      description: 'optional description>'
      fabric: 'myfab5'
      name: 'azr1-c01-myfab5'
    spec:
      role: 'manager'
      type: 'controller'
      properties:
        marketplace: False
      vpc: 'azr1-vpc-myfab5'
    state: 'configured'
  - kind: Processor
    metadata:
      description: 'optional description'
      fabric: 'myfab5'
      name: 'azr2-p01-myfab5'
    spec:
      config:
        orchestrator: 'controller-myfab5.myorg4.poc.bayware.io'
      properties:
        marketplace: False
      vpc: 'azr2-vpc-myfab5'
    state: 'started'
  - kind: Vpc
    metadata:
      description: 'optional description'
      fabric: 'myfab5'
      name: 'azr1-vpc-myfab5'
    spec:
      cloud: 'azr'
      properties:
      region: 'westus'
  - kind: Vpc
    metadata:
      description: 'optional description'
      fabric: 'myfab5'
      name: 'azr2-vpc-myfab5'
    spec:
      cloud: 'azr'
      properties:
      region: 'eastus'
  - kind: Workload
    metadata:
      description: 'optional description'
      fabric: 'myfab5'
      name: 'azr2-w01-myfab5'
    spec:
      config:
        orchestrator: 'controller-myfab5.myorg4.poc.bayware.io'
      properties:
        marketplace: False
      vpc: 'azr2-vpc-myfab5'
    state: 'started'
Edit Batch File
To amend the current fabric state with a desired amount of new VPCs, processors
and workloads, use your favorite text editor, e.g. vim or nano, to describe a
desired state:
]$ nano myfab5.yml
For example, to add more workloads to the existing VPC, duplicate the existing
workload specification as many times as needed while providing a unique name
for each new workload–in this example azr2-w02-myfab5 and azr2-w03-myfab5.
Note
You can either keep or remove the existing components from the batch file. While running the batch deployment, bwctl will apply only a difference between the current and desired state.
After editing, the batch file–in this example myfab5.yml –contains:
---
apiVersion: fabric.bayware.io/v2
kind: Batch
metadata:
  name: 'myfab5'
  description: 'Fabric "myfab5" export at Mon Oct 14 16:50:38 2019'
spec:
  - kind: Workload
    metadata:
      description: 'optional description'
      fabric: 'myfab5'
      name: 'azr2-w02-myfab5'
    spec:
      config:
        orchestrator: 'controller-myfab5.myorg4.poc.bayware.io'
      properties:
        marketplace: False
       vpc: 'azr2-vpc-myfab5'
     state: 'started'
  - kind: Workload
     metadata:
       description: 'optional description'
       fabric: 'myfab5'
       name: 'azr2-w03-myfab5'
     spec:
       config:
         orchestrator: 'controller-myfab5.myorg4.poc.bayware.io'
       properties:
         marketplace: False
       vpc: 'azr2-vpc-myfab5'
     state: 'started'
Run Batch Deployment
To deploy new fabric components from the batch file, run this command with the
batch file name–in this example myfab5.yml –as the argument:
(myfab5) bwctl> create batch myfab5.yml
You will see output similar to:
[2019-10-14 18:25:42.565]  Create batch: file='myfab5.yml', input=format='yaml', dry-run=False
...
[2019-10-14 18:33:29.640]  Batch is finished
Check your resource graph at this point to see that the fabric has two more workload nodes now.
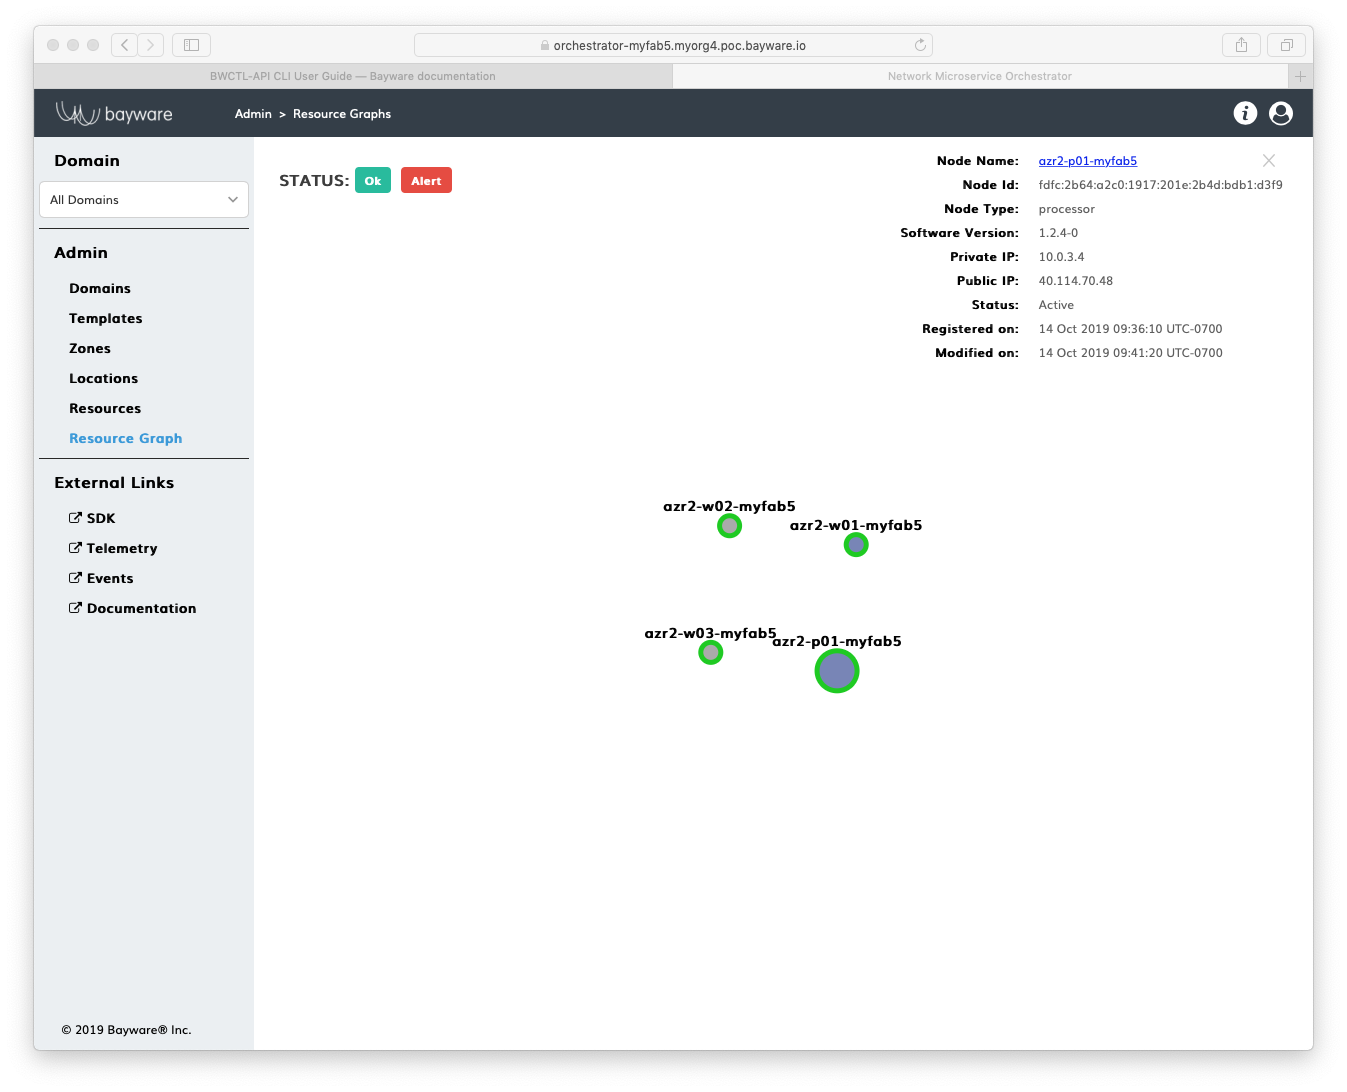
Fig. 123 Resource Graph after the Batch Deployment (Azure)
Create New Fabric
Create Batch File Template
You can use the state of your existing fabric, to create a new fabric. The new fabric might be completely identical to the existing one or have the same set of components but deployed in a different cloud.
First, export the current fabric configuration by running this command with the
file name–in this example myfab6.yml –as the argument:
(myfab5) bwctl> export fabric myfab6.yml
You should see output similar to:
[2019-10-14 18:41:47.936]  Exporting to 'myfab6.yml'
[2019-10-14 18:41:47.955]  Fabric configuration exported successfully
Note
In this example, the state of the fabric, extended in the prior step, is exported. So, the file myfab6.yml now describes two Azure VPCs, one orchestrator node, one processor node and three workload nodes.
Edit Batch File
To create a desired state for the new fabric, edit the file created in the prior step.
In this example, the new fabric will fully replicate in AWS the fabric existing
in Azure. So, use find-and-replace option in your favorite text editor to make
these changes to the batch file–in this example myfab6.yml:
| Specification | Before | After |
|---|---|---|
| Fabric Manager | myfab5 |
myfab6 |
| Cloud | azr |
aws |
| Control VPC Region | westus |
us-west-1 |
| Workload VPC Region | eastus |
us-east-1 |
Save the file after editing.
Run Batch Deployment
To deploy the new fabric from the batch file you have created in
the prior step, run this command with the batch file name–in this example
myfab6.yml –as the argument:
]$ bwctl create batch myfab6.yml
You will see output similar to:
[2019-10-14 18:53:56.377]  Create batch: file='myfab6.yml', input=format='yaml', dry-run=False
...
[2019-10-14 19:08:57.007]  Batch is finished
[2019-10-14 19:08:57.007]  IMPORTANT: Here is administrator's password that was used to initialize controller. Please change it after first login
[2019-10-14 19:08:57.007]  Password: 0Y417IqAMa6h
The new fabric with two VPCs, orchestrator, processor and three workload nodes have been created in AWS.
Warning
When a controller node of orchestrator is created during a batch deployment, a password is always shown in the last line of the command output. Write down the PASSWORD as it appears on your screen, as it will be needed later.
To check the current state of the new fabric, set bwctl to the new fabric by running this command with the fabric name-in this example myfab6 -as the argument:
]$ bwctl set fabric myfab6
You should see output similar to:
[2019-10-14 20:29:47.921] Active fabric: 'myfab6'
Now, export the current fabric state by running this command with the file
name–in this example myfab6-current.yml –as the argument:
]$ bwctl export fabric myfab6-current.yml
You should see output similar to:
[2019-10-14 20:30:09.084]  Exporting to 'myfab6-current.yml'
[2019-10-14 20:30:09.188]  Fabric configuration exported successfully
The file with the current fabric state contains:
---
apiVersion: fabric.bayware.io/v2
kind: Batch
metadata:
  name: 'myfab6'
  description: 'Fabric "myfab6" export at Tue Oct 15 15:30:09 2019'
spec:
  - kind: Fabric
    metadata:
      description: 'optional description'
      name: 'myfab6'
    spec:
      companyName: myorg4
      credentialsFile: {}
      sshKeys:
        privateKey: {}
  - kind: Orchestrator
    metadata:
      description: 'optional description>'
      fabric: 'myfab6'
      name: 'aws1-c01-myfab6'
    spec:
      role: 'manager'
      type: 'controller'
      properties:
        marketplace: False
      vpc: 'aws1-vpc-myfab6'
    state: 'configured'
  - kind: Processor
    metadata:
      description: 'optional description'
      fabric: 'myfab6'
      name: 'aws2-p01-myfab6'
    spec:
      config:
        orchestrator: 'controller-myfab6.myorg4.poc.bayware.io'
      properties:
        marketplace: False
      vpc: 'aws2-vpc-myfab6'
    state: 'started'
  - kind: Vpc
    metadata:
      description: 'optional description'
      fabric: 'myfab6'
      name: 'aws1-vpc-myfab6'
    spec:
      cloud: 'aws'
      properties:
      region: 'us-west-1'
  - kind: Vpc
    metadata:
      description: 'optional description'
      fabric: 'myfab6'
      name: 'aws2-vpc-myfab6'
    spec:
      cloud: 'aws'
      properties:
      region: 'us-east-1'
  - kind: Workload
    metadata:
      description: 'optional description'
      fabric: 'myfab6'
      name: 'aws2-w01-myfab6'
    spec:
      config:
        orchestrator: 'controller-myfab6.myorg4.poc.bayware.io'
      properties:
        marketplace: False
      vpc: 'aws2-vpc-myfab6'
    state: 'started'
  - kind: Workload
    metadata:
      description: 'optional description'
      fabric: 'myfab6'
      name: 'aws2-w02-myfab6'
    spec:
      config:
        orchestrator: 'controller-myfab6.myorg4.poc.bayware.io'
      properties:
        marketplace: False
      vpc: 'aws2-vpc-myfab6'
    state: 'started'
  - kind: Workload
    metadata:
      description: 'optional description'
      fabric: 'myfab6'
      name: 'aws2-w03-myfab6'
    spec:
      config:
        orchestrator: 'controller-myfab6.myorg4.poc.bayware.io'
      properties:
        marketplace: False
      vpc: 'aws2-vpc-myfab6'
    state: 'started'
Login to the new orchestrator and check the resource graph of your new fabric.
At this point, you will see that the new fabric in AWS completely replicates the Azure fabric.
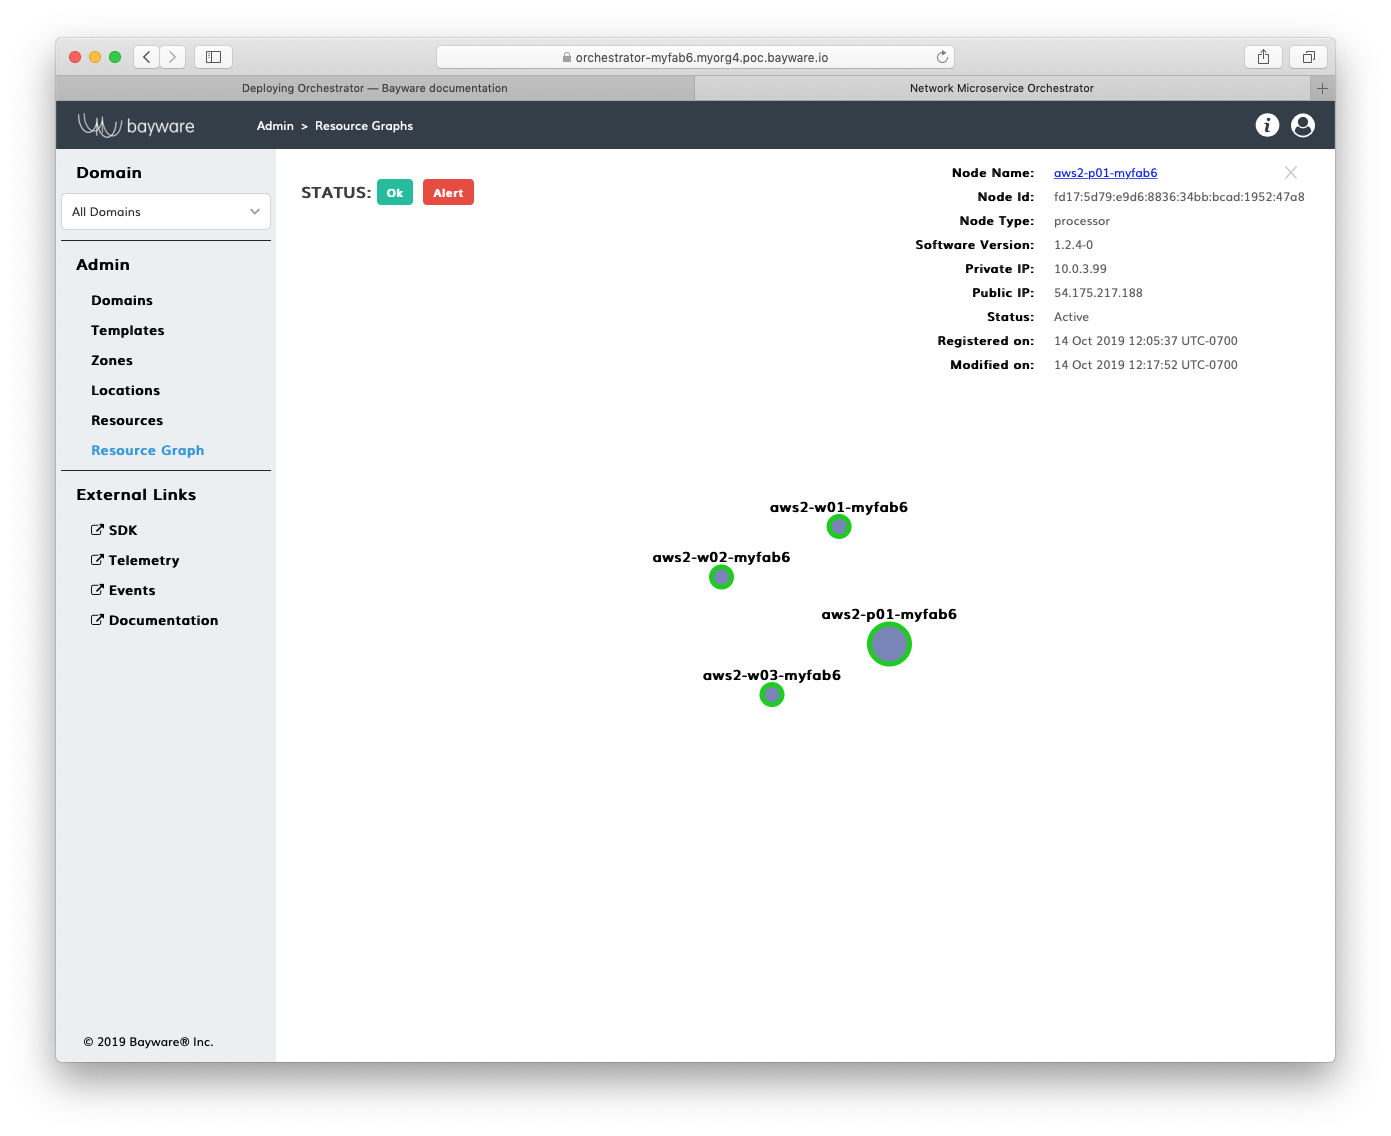
Fig. 124 Resource Graph of New Fabric (AWS)
Summary
Batch deployment is a powerful tool when you need to:
- add new VPCs or scale out processors and workloads in your existing VPCs;
- copy your existing environment, e.g.
test, and automatically create a new identical environment, e.g.production; - copy your entire infrastructure in one cloud and paste it in another.