Introduction
This tutorial demonstrates how to use Service Interconnection Fabric to quickly and securely deploy a three-tier, geo-redudant application in a multi-cloud or a hybrid-cloud environment using only a description of the application topology. The application topology can be depicted in an application service-type graph, which we will refer to here simply as the service graph.
After describing the service graph in the Service Interconnection Fabric orchestrator, you will see how easy it is to move service instances from private data centers to public clouds or between public clouds: all network address translation, encryption, protocol filtering, and routing will be established automatically.
The Scenario
You will install Getaway, a three-tier application spread across three VPCs located in three public clouds. The first VPC, located in AWS, contains a virtual machine (VM) running microservice getaway-proxy that functions as the presentation tier while another VM running microservice getaway-service functions as the application tier.
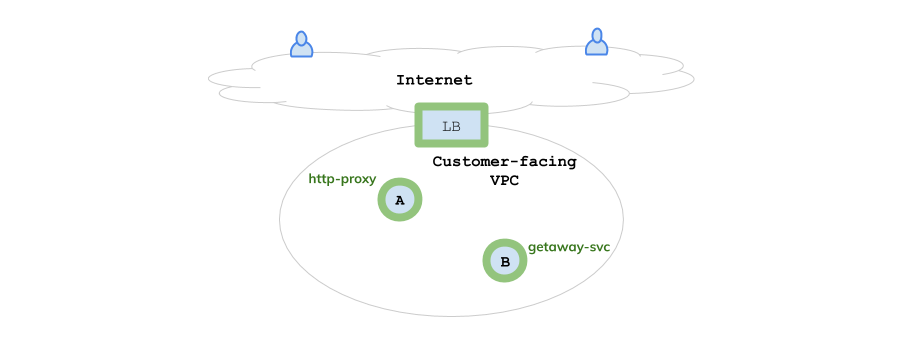
Fig. 61 AWS VPC: Proxy + Application
The AWS VPC and virtual machines come pre-installed in this tutorial. An additional AWS VPC contains three virtual machines that comprise the orchestrator components: a controller, a telemetry node, and an events node. These are also pre-installed.
The next VPC, in Google Cloud (GCP), functions as the data tier by responding to requests from the application tier for weather, places, and news data for a given city. You will install this VPC and its three VMs using the Fabric Manager (FM) node.
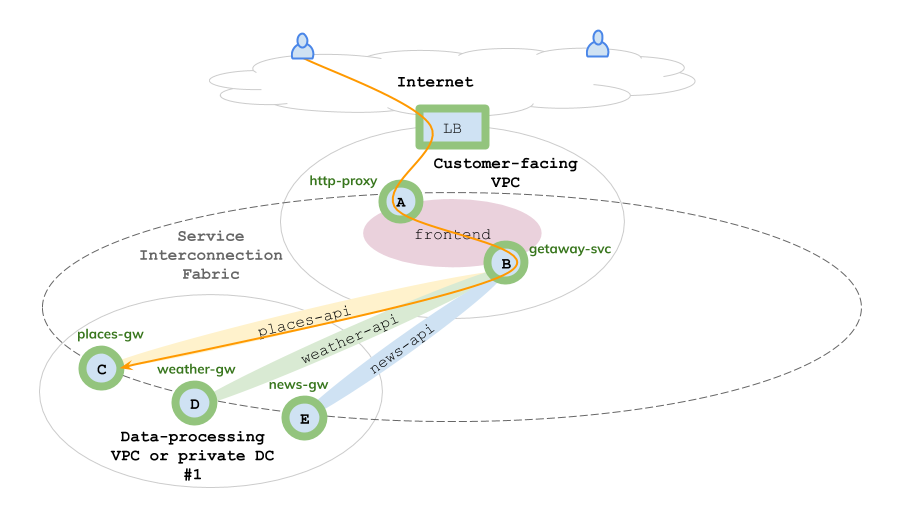
Fig. 62 GCP VPC: Weather, Places & News Data
The final VPC, located in Microsoft’s Azure, duplicates the weather, places, and news data VMs from the GCP VPC to create a geographically-redundant data center for disaster recovery or data migration from one cloud to another. Again, you will also install these resources using the Fabric Manager.
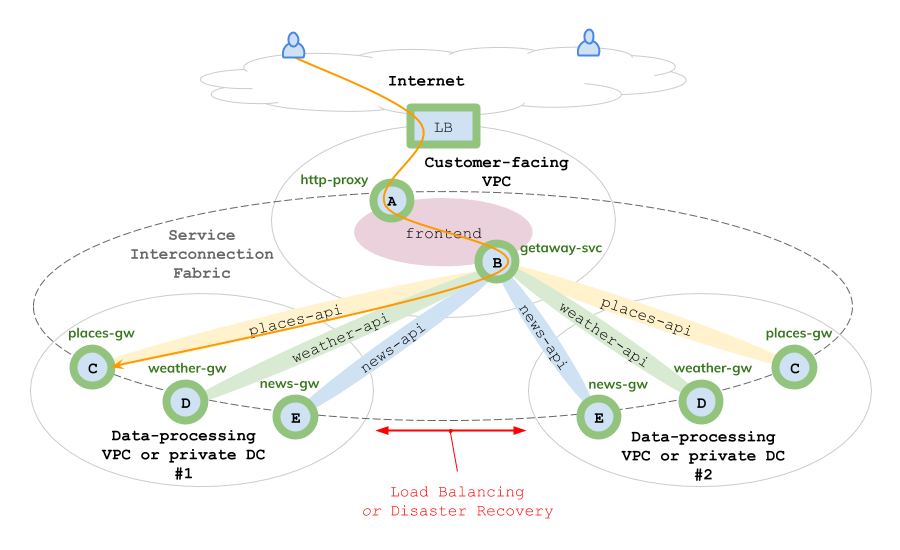
Fig. 63 Azure VPC: Disaster Recovery
Personalized Installation
Bayware creates a customized tutorial sandbox for each user. Your welcome email has an attachment called Sandbox Installation Summary (SIS), which looks similar to the following
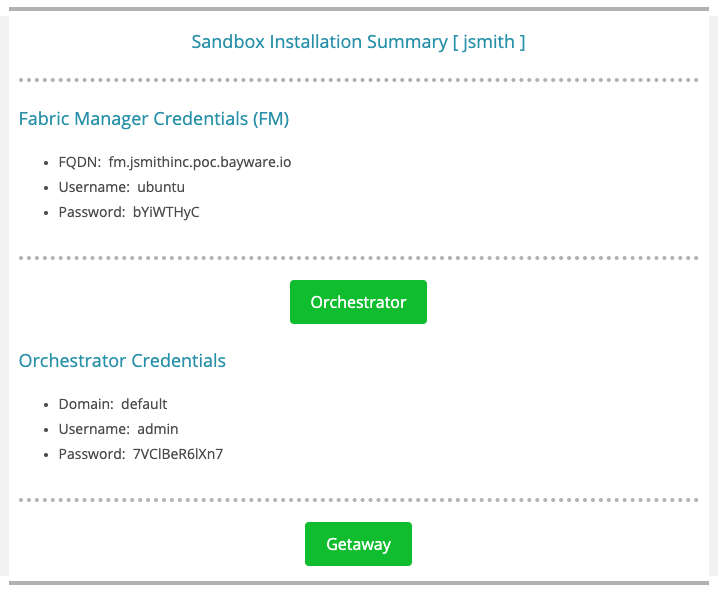
Fig. 64 Example Sandbox Installation Summary
The Orchestrator and Getaway buttons are linked to your dedicated sandbox orchestrator and the example application you are building, respectively. The former requires login credentials, which are given in the SIS; the latter won’t resolve until you finish deploying the application.
Use these buttons whenever you need to open the orchestrator or Getaway in a browser window. You may also copy and paste the underlying links into your browser, if that suits your needs better.
Fabric Manager
You will interact with the application’s infrastructure through the Fabric Manager (FM). The FM has two command-line tools: bwctl and bwctl-api that allow you to manage cloud-based infrastructure resources and application policy, respectively.
To get started, open a terminal window on your computer as outlined in Requirements for your operating system. At the prompt, use the user name and FQDN for your fabric manager that is in the welcome email SIS attachment and type (using your FM FQDN, not the example FQDN for jsmith shown here):
]$ ssh ubuntu@fm.jsmithinc.poc.bayware.io
Be aware that the first time you log in to a new machine, you might see a warning message that looks like
]$ ssh ubuntu@fm.jsmithinc.poc.bayware.io
The authenticity of host 'jsmithinc.poc.bayware.io (13.56.241.123)' can't be established.
ECDSA key fingerprint is SHA256:6LLVP+3QvrIb8FjRGNleLQRy7zL2eXeNCdOoYRbbxqw.
ECDSA key fingerprint is MD5:7b:fd:15:4c:35:d3:1d:20:fd:3e:3d:b7:1b:14:6a:1b.
Where it asks if you wish to continue, just type yes.
Are you sure you want to continue connecting (yes/no)? yes
You will be prompted for your password with the following query
ubuntu@fm.jsmithinc.poc.bayware.io password:
Type in the password for your fabric manager. You should now be logged in and ready to go. Your Linux command-line prompt should look similar to
ubuntu@jsmith-c0:~$
Throughout the remainder of the tutorial, the Linux command-line prompt will be abbreviated as
]$
If it’s not entirely clear, keep in mind that you can open up as many SSH sessions with your fabric manager as you require. Simply fire up another terminal window on your computer and log in as just described.
Orchestrator: Controller, Telemetry, & Events
Access the orchestrator from a browser window using the button and credentials
shown in your welcome email
(see this example above).
You will need Domain, User Name, and Password as shown in
Fig. 65.
From the orchestrator’s controller window you will be able to
access windows for telemetry and events using the sidebar navigation menu.
Be sure to keep the orchestrator browser window open throughout this tutorial
since you will be referring to it frequently.
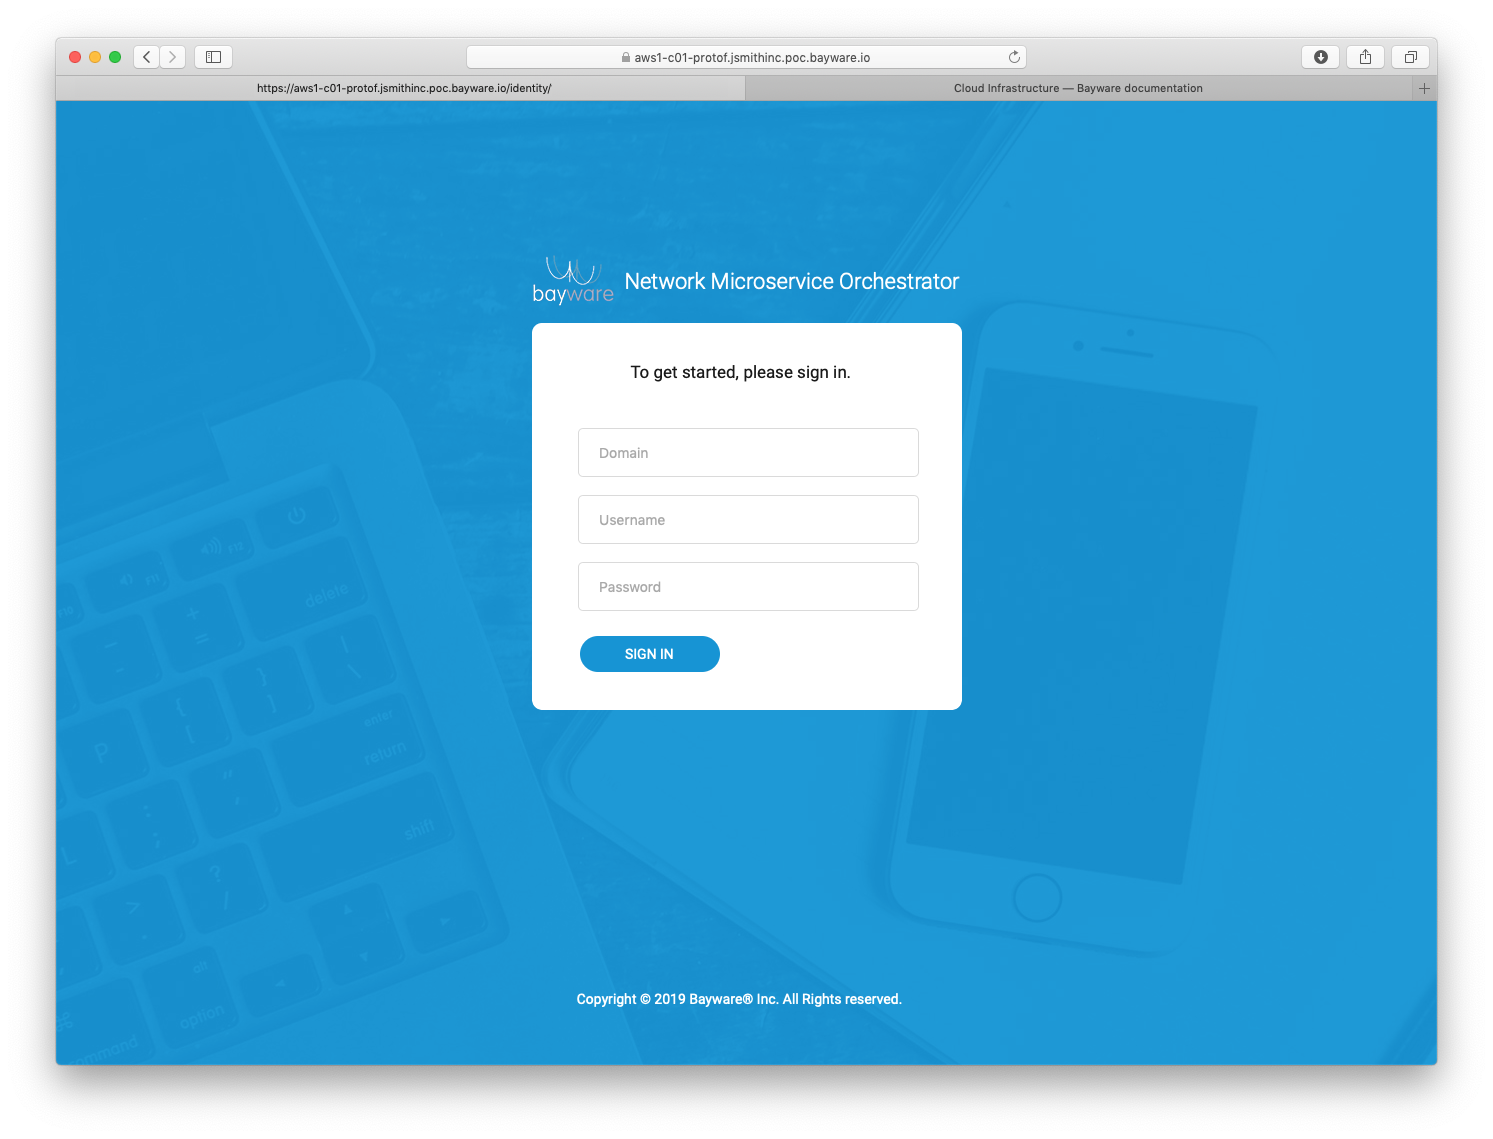
Fig. 65 Orchestrator Login Page
Summary
In this section you were introduced to Getaway, the application you will work with throughout this tutorial. You prepared for the following sections by learning how to log into your Fabric Manager node and bring up the SIF Orchestrator in your browser.
Next up: build out the infrastructure needed to deploy Getaway services in Google Cloud and Azure.